
How Do You Make Iced Coffee With a Blender in 10 Easy Steps?
Start by brewing strong, medium to dark roast coffee and chilling it well. Making iced coffee with a blender is a quick and easy way to enjoy a refreshing, creamy drink at home. This method ensures your iced coffee is smooth, frothy, and full of flavor.
Add one cup of coffee and one cup of small ice cubes to your blender, then include a splash of milk or cream and your favorite sweeteners or flavorings.
Blend on low, then high for about 20–30 seconds until smooth and frothy. Taste and adjust as needed.
Pour into a chilled glass, add extra ice if you like, and enjoy a revitalizing, creamy iced coffee. Keep following for more tips to perfect your blend!
Key Takeaways
- Brew strong, cooled coffee with medium to dark roast beans, and prepare small ice cubes for smooth blending.
- Combine coffee, ice, milk or cream, and sweeteners or flavorings, adjusting quantities to taste.
- Blend on low speed initially, then high speed for 20-30 seconds until creamy and frothy, avoiding over-blending.
- Serve immediately in chilled glasses with extra ice cubes, preferably coffee ice cubes for prolonged coldness.
- Taste before serving and adjust sweetness, creaminess, or espresso shots for balanced flavor.
Gather Your Ingredients and Tools
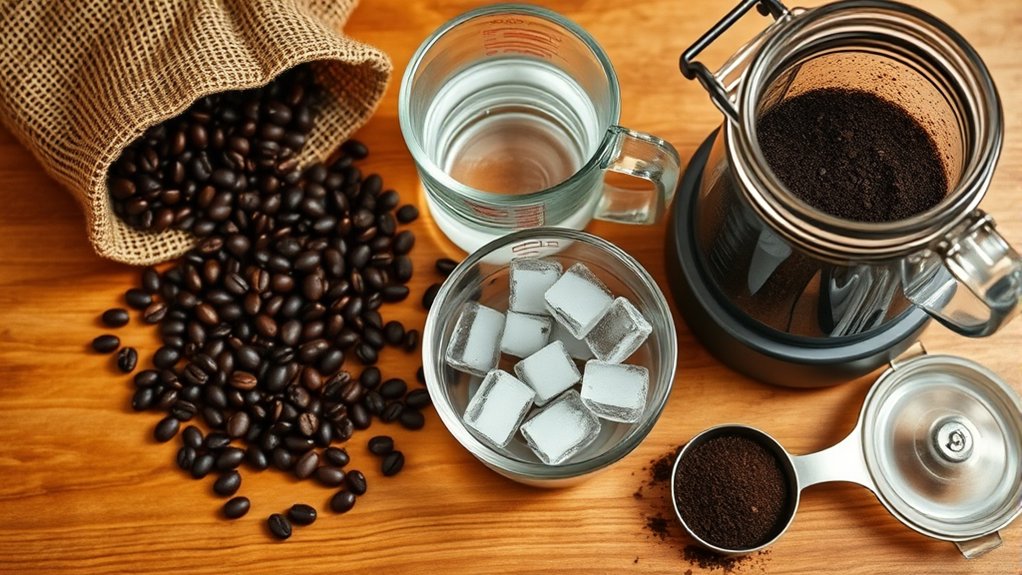
Where do you begin when making iced coffee with a blender? First, gather all your ingredients and tools so you’re ready to go. You’ll need brewed coffee, preferably cooled, ice cubes, and your preferred sweetener or milk.
If you like, grab flavorings like vanilla extract or cinnamon. For tools, make sure your blender is clean and functioning well. You’ll also want a measuring cup or spoon to get your ingredient amounts right.
Have a tall glass or two ready for serving. By assembling everything upfront, you’ll streamline the process and avoid scrambling mid-blend. With these basics in place, you’re set to create a smooth, revitalizing iced coffee that’s perfectly blended every time.
Choose the Best Coffee Beans for Blender Iced Coffee

Once you have your ingredients and tools ready, it’s time to focus on the coffee itself. Picking the right beans makes all the difference in your blender iced coffee’s flavor. Here’s what to regard:
- Choose Medium to Dark Roasts: These have richer flavors that hold up well when diluted with ice and milk.
- Opt for Freshly Ground Beans: Grinding just before brewing preserves aroma and taste, giving your iced coffee a vibrant kick.
- Select Beans with Chocolate or Nutty Notes: These flavor profiles blend smoothly with creamy, cold beverages, enhancing the overall experience.
Brew Strong Coffee Quickly

To brew strong coffee quickly, start by choosing bold, dark roast beans that pack more flavor. You’ll want to pick a fast brewing method like an espresso machine or AeroPress to save time without sacrificing strength.
With a few simple tips, you can get rich, powerful coffee ready for blending in minutes.
Choosing Coffee Beans
How do you pick the best coffee beans to brew a strong cup quickly? Start by focusing on beans that naturally produce a bolder flavor and higher caffeine content. You want beans that give you a robust taste without wasting time on slow brewing processes.
Here’s what to contemplate:
- Choose dark roasts – They offer a rich, intense flavor that stands out even when iced and blended.
- Opt for Arabica or Robusta blends – Arabica has smooth flavor, while Robusta packs more caffeine and bitterness for strength.
- Buy freshly roasted beans – Freshness ensures maximum flavor and aroma, which is vital for a strong, quick brew.
Picking the right beans sets the foundation for a powerful iced coffee made fast in your blender.
Brewing Methods Overview
Several brewing methods can deliver a strong coffee quickly, perfect for blending into iced coffee. You want a brew that’s intense and ready fast to avoid dilution when ice is added. Each method offers a unique balance of strength, time, and flavor clarity.
| Method | Brew Time | Strength Level |
|---|---|---|
| Espresso | 25-30 seconds | Very Strong |
| AeroPress | 1-2 minutes | Strong |
| French Press | 4 minutes | Medium-Strong |
| Drip Coffee | 3-5 minutes | Medium |
Choosing a quick, strong brew method like espresso or AeroPress helps maintain bold flavor when blended with ice, making your iced coffee vibrant and satisfying every time.
Tips for Stronger Coffee
Strong coffee is the foundation of a great iced coffee, especially when you’re blending it with ice that can quickly dilute the flavor.
To brew strong coffee quickly without sacrificing taste, focus on these key tips:
- Use a Fine Grind: A finer grind extracts flavor faster, giving you a richer brew in less time.
- Increase Coffee-to-Water Ratio: Use more coffee grounds per cup than usual to boost strength.
- Brew with Hot Water Just Off Boil: Water around 200°F extracts maximum flavor quickly without bitterness.
Cool Blender Iced Coffee Quickly
Although blending hot coffee with ice cools it quickly, you can speed up the process even more by using chilled ingredients and pre-cooling your blender. Start by refrigerating your brewed coffee before blending to lower its temperature. Pour the cold coffee into a blender that’s been chilled in the fridge or freezer for 10-15 minutes.
This helps prevent the ice from melting too fast, keeping your iced coffee from becoming watered down. Using cold milk or cream instead of room temperature adds to the chill factor. Also, avoid over-blending; pulse in short bursts to mix everything without warming the drink through friction.
These simple steps help you enjoy perfectly cold, invigorating iced coffee in no time.
Add Coffee and Ice to Your Blender
You’ll want to pick a strong, bold coffee to keep the flavor rich after blending. Adding the right amount of ice is key—too much can water down your drink, too little won’t chill it properly.
Let’s look at how to balance these for the best iced coffee.
Choosing Coffee Type
What kind of coffee should you choose to make the best iced coffee with your blender? Your choice impacts flavor and texture, so pick wisely. Here are three key tips:
- Use Strong Brewed Coffee or Espresso – Since ice will dilute your drink, start with a bold coffee or espresso to keep the flavor rich and satisfying.
- Opt for Freshly Ground Beans – Fresh grounds provide more aroma and depth, making your iced coffee taste vibrant instead of flat.
- Choose Medium to Dark Roasts – These roasts offer a robust, slightly sweet flavor that pairs well with cold brewing and blending, enhancing your iced coffee experience.
Ice Quantity Tips
Once you’ve selected the right coffee, it’s time to focus on the ice quantity for your blended iced coffee. The key is balancing enough ice to chill and thicken the drink without diluting the flavor. Start with a ratio of about one cup of ice for every cup of brewed coffee.
If you prefer a creamier texture, add a bit more ice. Using too little ice results in a runny blend, while too much can water down your coffee’s rich taste. Also, consider the size of your ice cubes; smaller cubes blend more smoothly and quickly.
Adjust the ice amount based on your blender’s power and personal taste, aiming for a invigorating, perfectly chilled iced coffee every time.
Add Milk or Cream for Creaminess
Although black coffee has its own charm, adding milk or cream transforms your iced coffee into a smoother, more indulgent treat. When you blend your iced coffee, the creaminess balances the bitterness and creates a luscious texture.
Adding milk or cream to iced coffee softens bitterness and creates a rich, creamy texture for an indulgent sip.
Here’s how to add milk or cream for the best results:
- Choose your dairy or non-dairy milk: whole milk, almond milk, oat milk, or cream all work beautifully.
- Pour about 1/4 to 1/3 cup per serving directly into the blender with your coffee and ice.
- Blend again for a few seconds until everything’s well combined and creamy.
This simple addition elevates your iced coffee, making each sip richer and more satisfying without overpowering the coffee’s flavor.
Sweeten Your Blender Iced Coffee to Taste
You can sweeten your blender iced coffee with a variety of options like sugar, honey, or flavored syrups. Start with a small amount and adjust to your preferred sweetness level.
Taste as you go to make sure it’s just right for you.
Choosing Sweetener Options
When customizing your blender iced coffee, selecting the right sweetener can elevate the flavor to match your preference perfectly. You want a sweetener that blends smoothly and complements the coffee’s boldness without overpowering it.
Here are three popular options to consider:
- Simple Syrup – Dissolves easily in cold drinks, giving you a clean, sweet taste without gritty texture.
- Honey – Adds natural sweetness and a subtle floral note, but mix it well to avoid clumps.
- Flavored Syrups – Vanilla, caramel, or hazelnut syrups bring unique flavors that jazz up your iced coffee.
Choose one that fits your taste and dietary needs, and you’ll enjoy a perfectly sweetened, invigorating drink every time.
Adjusting Sweetness Levels
Since everyone’s taste buds differ, adjusting the sweetness level of your blended iced coffee guarantees it’s just right for you. Start by adding a small amount of sweetener, blend, then taste. Gradually increase the sweetness until you hit your perfect balance.
Remember, some sweeteners are sweeter than others, so adjust accordingly.
Here’s a quick guide to help you adjust sweetness based on your preference:
| Sweetness Level | Sweetener Amount (per 1 cup coffee) |
|---|---|
| Unsweetened | 0 tsp |
| Lightly Sweetened | 1 tsp |
| Medium Sweetness | 2 tsp |
| Sweet | 3 tsp |
| Very Sweet | 4+ tsp |
Feel free to experiment until your blended iced coffee tastes just how you like it!
Blend Until Smooth and Frothy
Although the ingredients are simple, blending them properly is key to achieving that perfect smooth and frothy texture.
Simple ingredients require careful blending to create a perfectly smooth and frothy coffee.
Here’s how you can do it:
- Start on low speed to combine the ice, coffee, milk, and sweetener gently, preventing splashes.
- Gradually increase to high speed for about 20-30 seconds until the mixture looks creamy and thick.
- Pause and check the consistency—the coffee should be smooth with a light froth on top, indicating air has been incorporated.
Avoid over-blending, as it can make the drink watery.
Taste and Adjust Flavors
Even after blending perfectly, you’ll want to taste your iced coffee and adjust the flavors to suit your preference. Take a small sip and notice if it’s too bitter, weak, or lacking sweetness. If it’s too strong, add a splash of milk or cream to mellow the taste.
For more sweetness, blend in a bit more sugar, honey, or flavored syrup. If you prefer a bolder coffee flavor, try adding a shot of espresso or a little instant coffee before blending again. Don’t hesitate to tweak the ingredients; the key is to balance the bitterness, sweetness, and creaminess until it’s just right for you.
Once you’re happy with the flavor, you’re ready to enjoy your perfectly customized iced coffee.
Serve Your Blender Iced Coffee Chilled
Once you’ve perfected the flavor of your iced coffee, it’s time to serve it chilled for the best experience. Keeping your coffee cold enhances its invigorating qualities and helps maintain the perfect balance of flavors.
Here’s how to serve your blender iced coffee chilled:
- Use chilled glasses – Pop your glasses in the freezer for a few minutes before pouring your coffee. This keeps the drink colder longer without diluting it.
- Add extra ice cubes – If you want it colder, add a handful of ice cubes right before serving. Use coffee ice cubes to avoid watering down the flavor.
- Serve immediately – Iced coffee tastes best fresh. Don’t let it sit out too long, as it will warm up and lose that satisfying chill you worked for.
Frequently Asked Questions
Can I Use Cold Brew Coffee Instead of Brewed Coffee?
Yes, you can use cold brew coffee instead of brewed coffee. It’s already smooth and concentrated, so just blend it with ice and your favorite mix-ins for a quick, invigorating iced coffee without any bitterness or extra brewing time.
What Type of Blender Works Best for Iced Coffee?
Imagine your morning bliss—only a high-speed blender with strong blades can crush ice smoothly and blend coffee evenly.
You’ll want one that’s powerful and durable, so your iced coffee turns out perfectly invigorating every time.
How Long Should I Blend to Avoid Melting the Ice?
You should blend for about 10 to 15 seconds to avoid melting the ice. This quick pulse chills the coffee without diluting it too much, keeping your iced coffee strong and revitalizing every time you blend.
Can I Make Iced Coffee Without Dairy or Sugar?
Yes, you can make iced coffee without dairy or sugar. Use black coffee or plant-based milk alternatives like almond or oat milk.
Add natural sweeteners like stevia or enjoy it plain for a invigorating, guilt-free drink.
How Do I Store Leftover Blended Iced Coffee?
Don’t just toss it—store leftover blended iced coffee in an airtight container or jar. Keep it refrigerated, and you’ll enjoy fresh taste for up to 24 hours.
Shake well before drinking to revive its flavor!
Conclusion
Now that you’ve mastered these simple steps, making iced coffee with a blender becomes your secret weapon against the heat. Imagine the invigorating chill swirling with rich coffee flavor, ready to awaken your senses with every sip.
It’s more than a drink—it’s a little moment of joy blended just for you. So grab your favorite mug, blend away, and savor that perfect, frothy delight anytime you need a cool escape.
With this easy iced coffee recipe using a blender, you can enjoy a refreshing, homemade coffee treat whenever you want. Embrace the convenience and deliciousness of blended iced coffee to beat the heat in style.